Urgent Weekend/Holiday Fulfillment Available - Click For Details


Stainless Steel Finishing: An Art Worth Learning
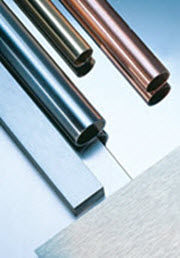
As architects and designers request more unique and decorative designs in stainless steel, the need for metal manufacturers to understand and be able to create, match or duplicate these designs becomes increasingly complex. Compounding this challenge, subtle variations of traditional common finishes make it not only difficult to identify the finish, but also nearly impossible to duplicate it using hand-held methods. Fit, form and finish are now more important to customers, and the time of fabricators producing simply a “commercially acceptable” finish has passed. Finishing has evolved into an art form, with fabricators struggling to learn how to achieve these modern touches in a cost-effective way.
This article will identify the most common stainless steel finishes recognized by the sheet metal industry – specifically the SSINA (Specialty Steel Industry of North America) – and explain both how they are created by the manufacturer and how to best replicate the finish in the field using hand-held tools.
Commonly used grades of stainless steel include:
300 Series – austenitic chromium-nickel alloys
Types 301 through 309, with 304 being the most frequently used
Type 310 and 310S for high-temperature applications
Type 316 for food and surgical stainless steel uses, as well as marine and nuclear applications
400 Series – ferritic and martensitic chromium alloys
Types 420 and 440 for cutlery applications
SSINA definitions for each finish are provided, followed by an explanation of how to match the finish – using hand tools in the field, whenever possible.
No.1 Finish
No. 1 Finish is produced by rolling stainless steel that has been heated prior to rolling (hot-rolling). This is followed by a heat treatment that produces a uniform microstructure (annealing) and ensures that the stainless steel will meet mechanical property requirements. After these processing steps, the surface has a dark, non-uniform appearance called “scale.” Surface chromium has been lost during the previous processing steps, and, without removal of the scale, the stainless steel would not provide the expected level of corrosion resistance. Chemical removal of this scale is called pickling or descaling, and it is the final processing step. A No. 1 finish has rough, dull, and non-uniform appearance. 1
Since this finish is seldom used in fabricating, there is no way to duplicate it by hand without removing the “scale” and altering the finish appearance. Any attempt to remove the scale using hand tools in the field will change the finish entirely. There is no way to duplicate the No. 1 finish with hand tools.
No.2B Finish
No. 2B Finish is a bright, cold-rolled finish commonly produced in the same manner as No. 2D, except that the final light-cold rolling pass is done using polished rolls. This produces a more reflective finish that resembles a cloudy mirror. Finish reflectivity can vary from manufacturer-to-manufacturer and coil-to-coil, with some coils looking quite mirror-like and others being fairly dull. No. 2B is a general-purpose cold-rolled finish commonly used for all but exceptionally difficult deep drawing applications. It is more readily polished to high luster than a No. 1 or No. 2D finish.1
The 2B finish is the fabrication and finishing industry’s most frequent starting point for the fabrication of petrochemical and paper mill equipment, sheet metal tanks, and other equipment where a decorative or linear finish is either not needed or wanted. Duplicating the bright, cold-rolled finish can be difficult because of the variation in finish from one manufacturer to another and because the manufacturer-applied finish is very uniform and free of roller markings. Any attempt to match this finish mechanically by hand will result in changing the uniformity of the base finish.
No. 2D Finish

No. 2D Finish is a uniform, dull silver-gray finish that is applied to thinner coils whose thickness has been reduced by cold rolling. After rolling, the coil is heat treated to produce a uniform microstructure (annealing) and to meet mechanical property requirements. Pickling or descaling is necessary after heat treatment to remove the chromium-depleted dark surface layer and restore corrosion resistance. Pickling can be the final step in production of this finish, but, when finish uniformity and/or flatness are important, there is a subsequent final light-cold rolling pass (skin pass) through dull rolls. A No. 2D finish is preferred for deep drawn components because it retains lubricants well. It is used as a substrate when a painted finish is desired. 1
The 2D finish is most often used in the manufacture of auto industry exhaust systems, trays, pans and items used in petro/chemical plants and roofing drain systems. Since this material is manufactured to retain liquids well it is often used where the material is painted or used where no additional finish is required. It is also preferred by metal fabricators as the starting point for fabrication prior to adding a decorative or linear finish over the entire piece. There is seldom any need to match the factory finish in the above mentioned applications and any attempt to do so results in the uniform surface altered by the abrasives used. If a No 2D finish is required the best method is to use a right angle or linear finishing tool equipped with a higher grit size unitized wheel.
No. 3 Finish
No. 3 Finish is characterized by short, relatively coarse, parallel polishing lines, which extend uniformly along the length of the coil. It is obtained by either mechanically polishing with gradually finer abrasives or by passing the coil through special rolls, which press a pattern into the surface that simulates the appearance of mechanical abrasion. It is a moderately reflective finish. When mechanically polishing, 50 or 80 grit abrasives are typically used initially, and the final finish is typically achieved with 100 or 120 grit abrasives. The surface roughness is typically Ra 40 micro-inches or less. If a fabricator needs to blend in welds or do other refinishing, the resulting polishing lines are usually longer than on product polished by a producer or toll-polishing house. 1
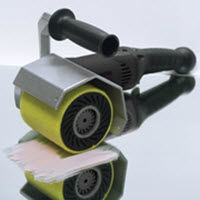
This finish is used in the manufacturing of food processing equipment not having direct contact with food, plus brewery and restaurant equipment. The manufacturer uses rollers to press the course grain into the finish, producing a short-grain linear pattern. In the field, a fabricator with a variable-speed linear finishing tool can closely approximate this finish using a 50-80 grit aluminum oxide or ceramic-coated abrasive belt or flap wheel at approximately 3500-4500 RPM to set the grain, followed by a 120 grit fleece nonwoven belt or drum at 5000 RPM to soften the finish and match the manufactured finish. The operator must use short strokes with the tool in an elliptical motion to duplicate the short-grain linear pattern of the manufacturing process.
No. 4 Finish

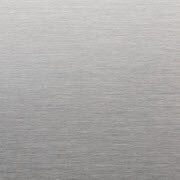
No. 4 Finish is characterized by short, parallel polishing lines extending uniformly along the length of the coil. It is obtained by mechanically polishing a No. 3 finish with gradually finer abrasives. Depending on the requirements of the application, the final finish can be anywhere between 120 and 320 grit. Higher grit numbers produce finer polishing lines and more reflective finishes. The surface roughness is typically Ra 25 micro-inches or less. This general-purpose finish is widely used for restaurant and kitchen equipment, storefronts and food processing and dairy equipment. If a fabricator needs to blend in welds or do other refinishing, the resulting polishing lines are usually longer than on product polished by a producer or toll-polishing house. 1

This finish is the most popular finish for appliances, the food and beverage industry, elevators, escalators, hospitals and any work area where there is food contact. It is the favorite finish of architects and is often classified as a sanitary finish.
Creating this finish in the field is a two-step process. The first step sets the initial scratch using either a flap wheel or a coated abrasive belt between 60-120 grit, depending on the existing finish. The second step softens the initial scratch and blends the finish to the desired final result. Belts attached to an inflatable or expandable drum will create a deeper scratch than the flap wheel, but either will work – it generally comes down to polisher preference. The tool should be operated at around 3500-4500 RPM, with only about 5-10% more pressure than the weight of the tool to allow the abrasive to work best. The variation of RPM also allows the operator to dial in the scratch to better match the manufactured finish. It is best to move the tool in an elliptical motion rather than straight back and forth to avoid noticeable finishing lines. By moving the tool in this manner, the operator also cuts the linear finishing lines to match the shorter polishing lines made by the producer. The second step, using the same tool and an 80-150 grit nonwoven fleece belt or drum, will soften and blend in the finish to match the existing finish. Note that RPM is more critical at this point. The higher the RPM, the more reflective the finish; the lower the RPM, the more distinct the finish. The finisher should use only a slight increase in pressure above the weight of the tool to allow for a smooth, uniform match to the factory finish.
This finish can vary substantially from one manufactured piece to another and will have a finish direction that needs to be considered when trying to fabricate two pieces together or when trying to match the existing finish on a fabricated piece. To determine the direction, the fabricator can run the back of a fingernail across the piece where a mark will be left in one direction but not the other. The fabricator must be sure to place the sheets with the direction going the same way so that the finish will remain uniform and can be matched after welding.
The weld may need to be blended in with a rotary tool and an 80-120 grit flap disc used with the direction of the weld to the thickness of 0.5 to 1 mm to avoid cupping the sides of the weld. Once the weld is blended, the fabricator can switch to a linear finishing tool with either a drum or a belt to regrain the affected area and to set the scratch following the procedure listed above.
No. 6 Finish
No. 6 Finish is a dull, silver-white finish with relatively short linear polishing lines. It has a lower reflectivity than No. 4 finish. It is produced by Tampico brushing a No. 4 finish sheet in an oil and abrasive medium. This finish is sometimes seen on stainless steel architectural applications that were installed between roughly the 1930s and 1980s, including the exterior columnar panels adjoining the windows of the Empire State Building. It is no longer produced by the toll polishing houses, but custom fabricators occasionally apply it to small projects. Other finishes, which do not resemble it in appearance, are sometimes sold as a No. 6. Because this finish has essentially ceased to exist, no photo is available. 1
This finish has ceased to exist in the marketplace as a traditional No. 6 finish, though a satin finish is prevalent and sometimes mistakenly identified as a No. 6 finish. To create this finish in the field, the procedure and the technique are the same as the standard No. 4 finish, except that the grits used to match the finish are higher. Starting with the No. 2B material, the finisher would use 120-150 grit belt or drum on the linear finisher to set the scratch and then finish with a fine or 180-220 fleece nonwoven drum or a fine belt. The speed of the tool would be the same – approximately 3000-3500 RPM – and the operator pressure should remain at 10% above the weight of the tool. The same elliptical polishing motion should be used by the operator to ensure the linear finish. If a higher reflectivity is required, the finisher can switch to a 400 grit drum or a super fine belt.
No. 7 Finish
No. 7 Finish has a high degree of reflectivity and a mirror-like appearance. A No. 4 finish that has been polished to 320 grit is buffed for up to 10 minutes, but existing grit lines are not removed. The remnants of fine polishing lines can generally be seen by an observer standing several feet from a panel. 1
No. 8 Finish
No. 8 Finish is the most reflective polished finish that is covered by the ASTM standards. It is produced in the same manner as the No. 7 finish, except that the buffing is continued for an additional five to 10 minutes. In comparison to a No. 7 finish, the grit lines are much less visible, but they can be seen if the finish is examined closely. The resulting finish is mirror-like but not a perfect mirror. 1

These two finishes are ornamental finishes generally used where there is little contact with outside sources due to the high cost of maintaining the finish in the field. Applications include panels and columns, often in high-end luxury hotels and office buildings. This finish is becoming more and more popular. One example is “Cloud Gate,” the public sculpture located in Millennium Park in Chicago. This sculpture, polished to a mirror finish, is viewed by millions yearly and serves as a focal point for tourism in Chicago.
To finish to a mirror is not difficult, but it is time consuming. The difference between the No. 7 and No. 8 finish is just additional polishing time; the procedure is the same. The difference between the reflective finish from 10 feet to 2 feet to 2 inches is really just additional finishing time, estimated to double for each descending distance increment. Creating a mirror finish by hand requires pre-finishing steps followed by polishing steps.
Pre-Finishing
Pre-finishing is achieved by finishing with increasingly higher grit sleeves or belts from 320 up to 2000 in an effort to flatten the surface and remove any scratches. The finisher should always “start at the finish,” keeping the end result in mind and never putting any scratches into the workpiece that will need to be removed to achieve the desired finish. This means that if the workpiece is clean and free of incidental scratches, the finisher may not need to use the lowest grit sizes because doing so would add unnecessary scratches. Instead, the fabricator can start the process with a higher grit, thus preventing the need to remove any unnecessary scratches put into the material by the lower grits. However, the fabricator cannot skip over grit sizes once the process is started since each grit size is used to remove the previous scratch.
The speed of the linear finishing tool is between 3200 and 3700 RPM and the presentation changes from in-line graining used in the lower linear finishes to cross grain. With each successive grit change the finisher should change tool direction by 45 to 90 degrees. This direction change cuts the scratches into smaller pieces allowing for them to be removed more easily and also level the material to accept the polishing step. This step is very important, cutting corners will result in scratches remaining after polishing. The same elliptical polishing motion should be used by the operator to ensure the linear finish and the change in direction between each grit change is equally important.
Polishing
Polishing is the final step in the mirror finishing process. It involves using successive “cut and color” compounds with fleece or merino wool sleeves to polish the material to the desired reflectivity.
Step 1:
Apply 1200-1500 grit polishing compound onto a clean polishing sleeve – never directly to the material – being sure to cover the outside edges. The polishing step takes several minutes of multi-directional movement in an elliptical motion at a speed of 2500-3000 RPM to cut the scratches smaller and smaller, while at the same time removing them. Continue to work the piece, adding additional paste to the sleeve if necessary until the piece appears to begin to shine. Note: the polishing sleeve should be marked on the inside with the grit size or color of the paste to separate it from other sleeves, and it should be placed in a clean resealable bag upon removal from the drive roller to protect it from future contamination.
Step 2:
A special cleaning powder is added to the surface area to encapsulate and remove the polish prior to a second polishing step. Sprinkle the work surface with the powder and then use a clean microfiber cloth to wipe the surface clean and prepare for the next step.
Step 3:
Apply the higher 2000 grit polishing compound onto a new marked polishing sleeve. Repeat step one for several minutes as the compound further reduces the scratches and polishes the piece to a higher finish. The more time spent on this step, the better the chance that the final finish is achieved.
Step 4:
Once the desired finish is achieved from Step 3, sprinkle cleaning powder on the piece again and then remove it with a microfiber cloth. Be careful to remove the encapsulated compound without adding any scratches to the surface.
Step 5:
The final step uses a polishing cream on a cotton drum to accentuate the finish. The polishing compound should be added to the drum, not the workpiece. The tool should be run at full speed and the operator should just barely touch the workpiece with the buffing drum. This final step will result in a highly reflective mirror finish.
Achieving the desired finish is not complicated. It is simply a matter of understanding the desired result and following a set procedure, common sense and proper work habits. Proper handling of the tools and consumables is imperative to ensure that the finish is matched or created properly and efficiently. There can be a great deal of satisfaction when the final customer is exhilarated by the results of a fabricated workpiece with the exact finish on it. It will resemble a work of art, because that is exactly what it is.
To learn more about how the surface finishes noted above can be efficiently and successfully achieved, or to discuss any technical issues you may have trying to obtain the aforementioned finishes, contact CS Unitec’s surface finishing experts at 1-800-700-5919 or 203-853-9522.
References:
1http://www.ssina.com/finishes/sheetsamples.html